How to transfer a WordPress website to Naija Domains
If you wish to transfer your website to Naijadomains, you will need an active web hosting plan with us as it will allow you to avoid downtime during the transfer. In order to transfer your WordPress site from another provider to us, you will need to perform two main steps:
- Transfer your files/databases to your hosting account with Naija Domains, adjust necessary configuration settings.
- Point nameservers to the Naija Domains hosting DNS system.
Note that you may change your nameservers before or after transferring content (it’s up to you), but we strongly suggest you change the nameservers after the content transfer and configuration are completed.
If you do have cPanel with your former hosting provider, we recommend you to follow this article.
In case you do not have cPanel with your current hosting provider, you will need to proceed with the following steps:
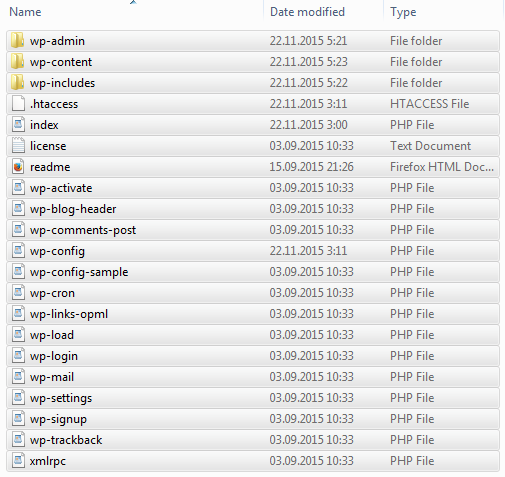
1. Sign into your hosting account with your former provider and navigate to the folder where you have your WordPress installed.
2. Choose all files that stand for WordPress and download them to your PC:
3. Download a MySQL database that is used for your WordPress blog in question. In case you face any difficulties with getting your database from your former provider, we suggest you contact their support and ask them to provide you with the MySQL database.
4. Connect to your hosting account with Naija domains via FTP. Choose the folder for your domain and upload WordPress files from your former hosting provider that were saved on your PC at step 1. If you need guidance regarding the files uploading procedure, you may find it here.
If you transfer the WordPress installation for your main domain with us, you need to upload files to /home/cpanelusername/public_html/
If you transfer the WordPress installation for the addon domain, you need to transfer your files to the folder which is assigned to your addon domain –/home/cpanelusername/public_html/addondomain/
5. Now the files are uploaded, and we’re almost there. Now you need to connect your WordPress installation to the database. To do so, create a new database and user in your cPanel account. This tutorial will help you.
6. Once the database is created, you need to import the content from your former host into it.
NOTE: If the database in question exceeds the 50Mb size, refer to this guide. Once imported, feel free to go over to step 7 described in this article.
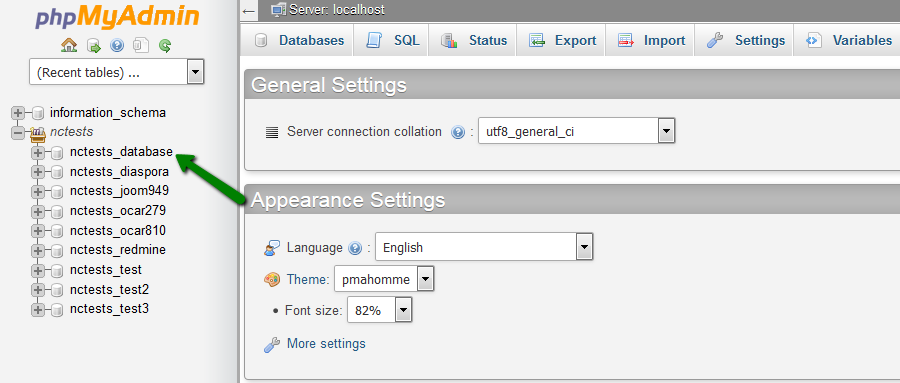
- Log into your cPanel account
- Find phpmyadmin tool and click on it:

- From the left-side database list choose the one you’ve just created and click on it:
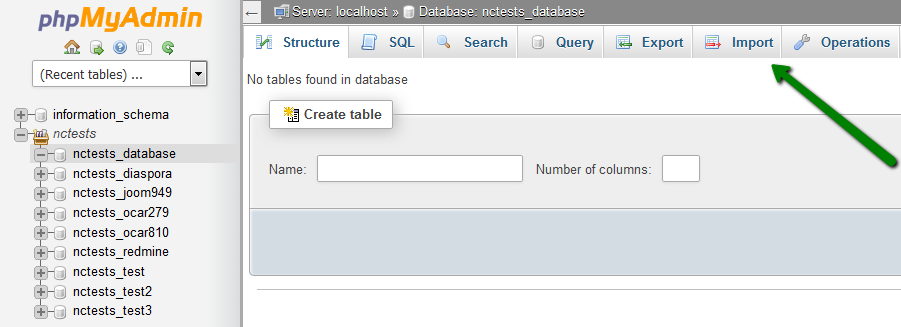
- On the options bar, click Import:
- Click Browse and locate a .sql file from your computer:
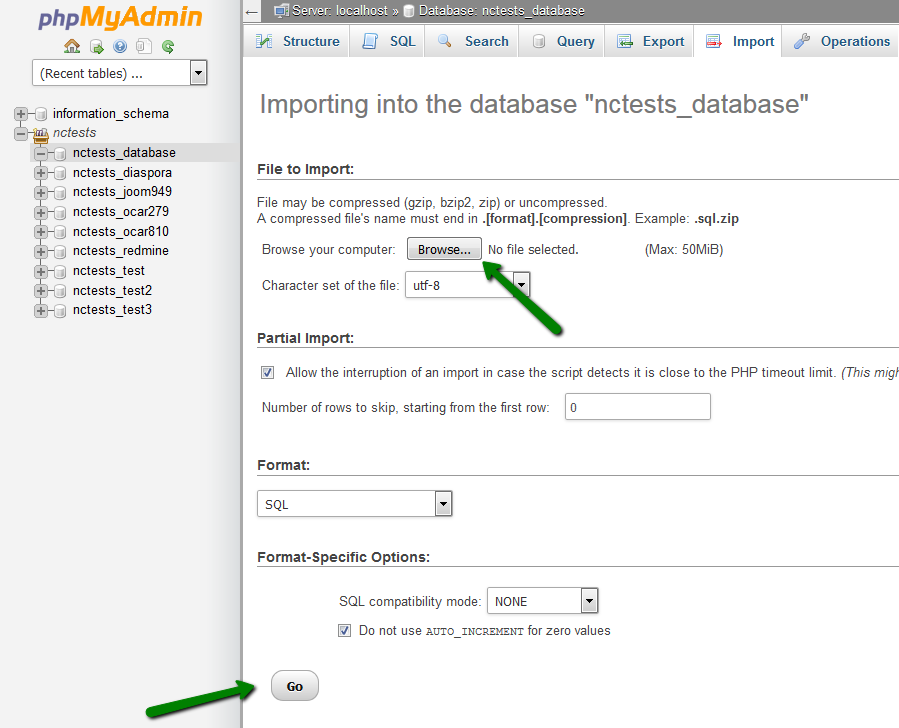
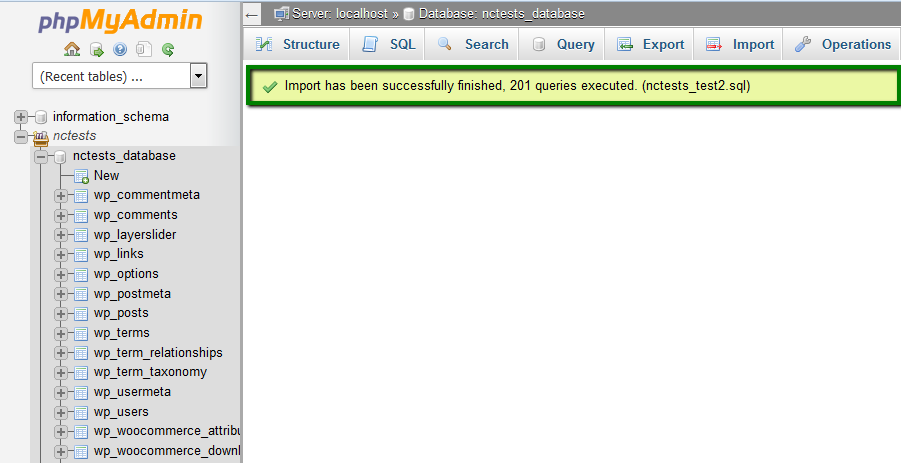
- Once the database is chosen, press Go.
- You will see the message when the import is finished:
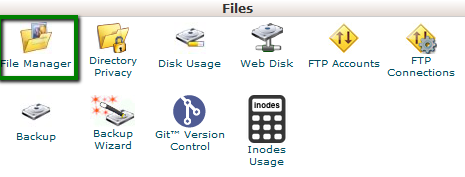
7. After the database creation and import are completed, please navigate to the folder where your WordPress installation is stored. You may do it via File Manager in your cPanel account:
- Log into your cPanel.
- Find the File Manager menu and click on it:
- Check Document root for: and choose your domain from the drop-down menu. Press Go:

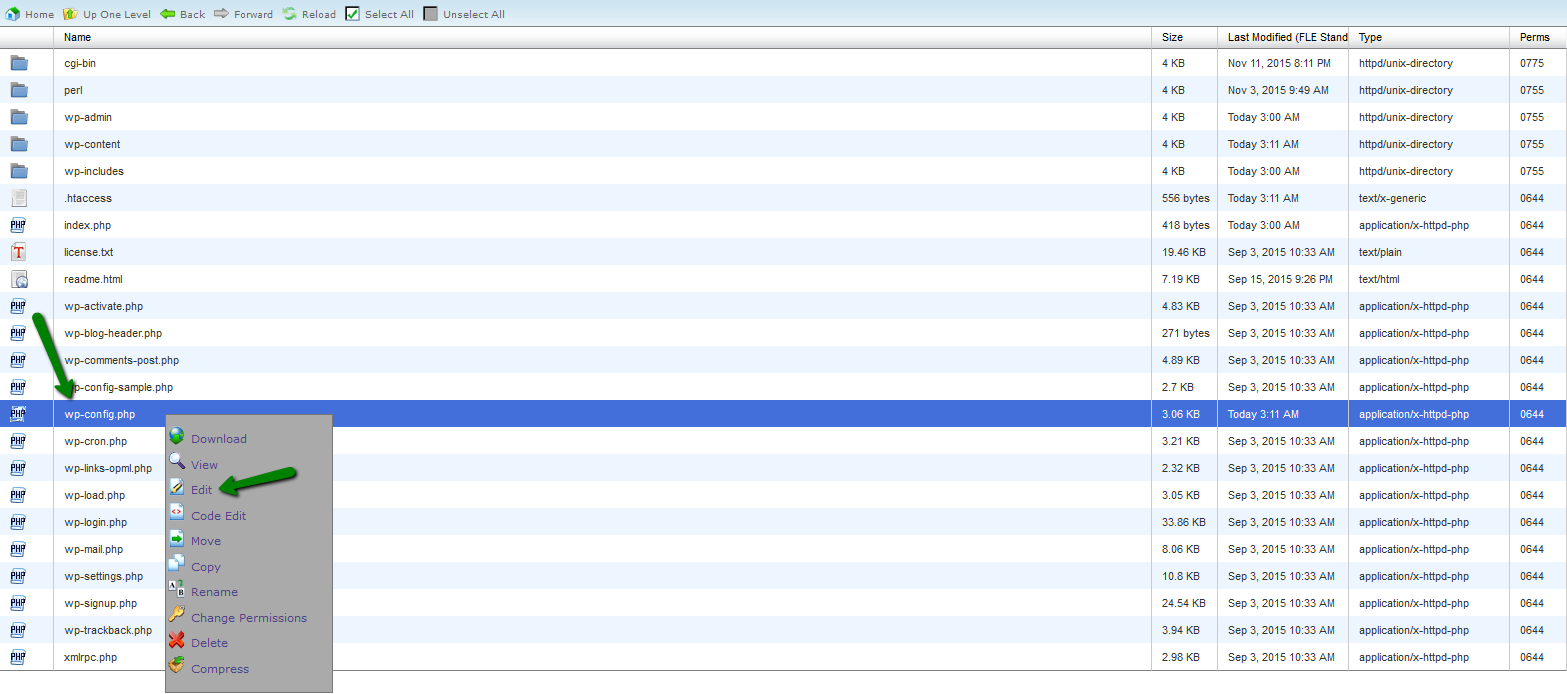
- Navigate to the folder where your WordPress is stored. Choose the wp-config.php file, right-click on it and press Edit:
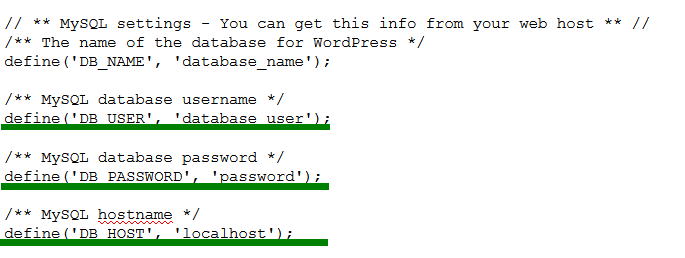
- Fill in the lines with the appropriate name, user and password of the database that has been created and imported before as shown in the screenshot. The MySQL hostname should be localhost. Once the changes are made, save changes:
Make sure that your domain is pointed to the Naija Domains hosting DNS system.