How to transfer WordPress Multisite (WPMU)
Transferring WPMU to another directory
Transferring WPMU to another domain
If you have installed WordPress Multisite to the subfolder (yourdomain.com/subfolder), it is possible to move it to another folder or to the root directory of the domain in a few steps. In our example we will be moving the website from yourdomain.com/subdomain to yourdomain.com.
First of all, we recommend to create the backup of the website files and database. The instructions can be found here.
Once the backup is created, you can start the WPMU transfer.
1. Files transfer from the subfolder to the main folder
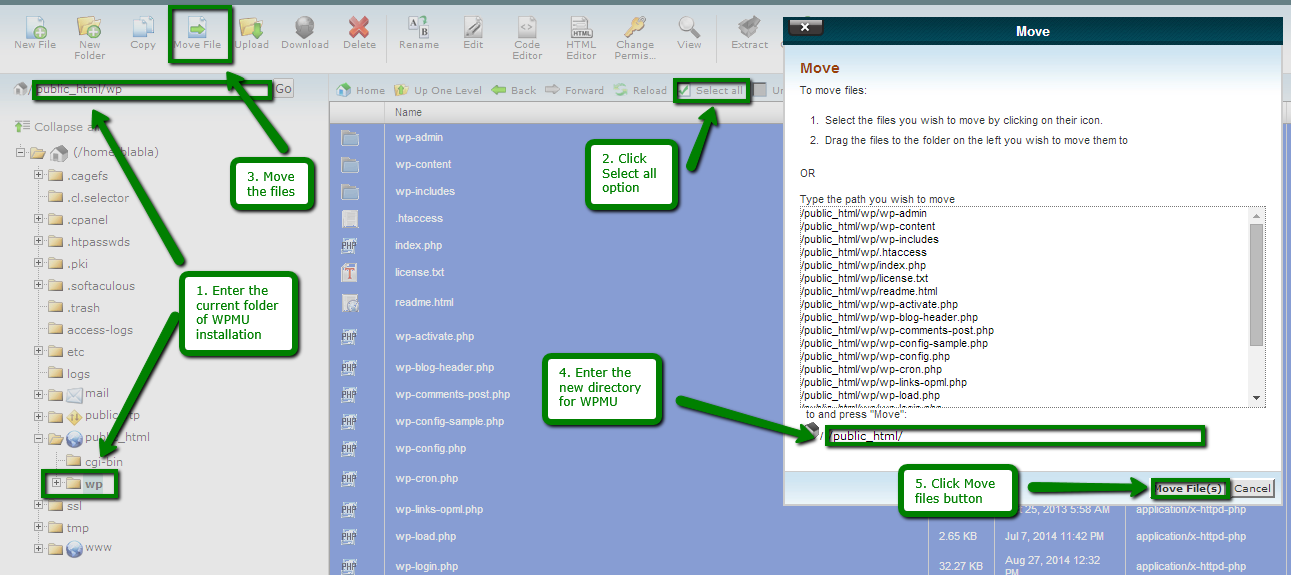
Go to cPanel > File manager > open the folder where WordPress Mulsitite files are located > Select all > the Move File option in the top menu in order to move these files to the new directory:
2.Database configuration
Go to the phpMyAdmin menu that is located under the Databases section in cPanel and choose your WordPress database on the left side.
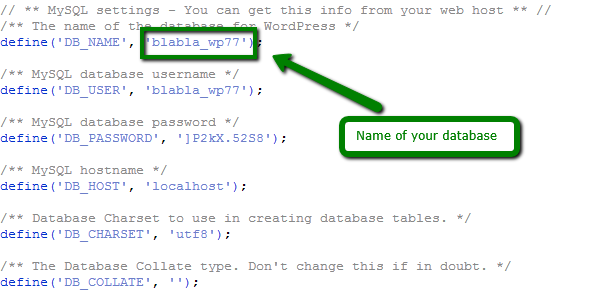
In case you do not know the name of the database, you may check it in the wp-config.php file as shown here:
You need to access the database and change the options in the tables as described below (in our example the table prefix is wp_):
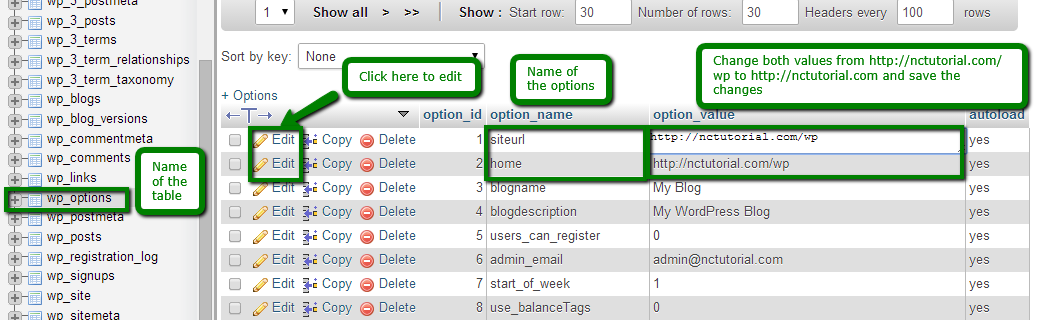
wp_options: change options siteurl and home from http://yourdomain.com/subfolder to http://yourdomain.com:
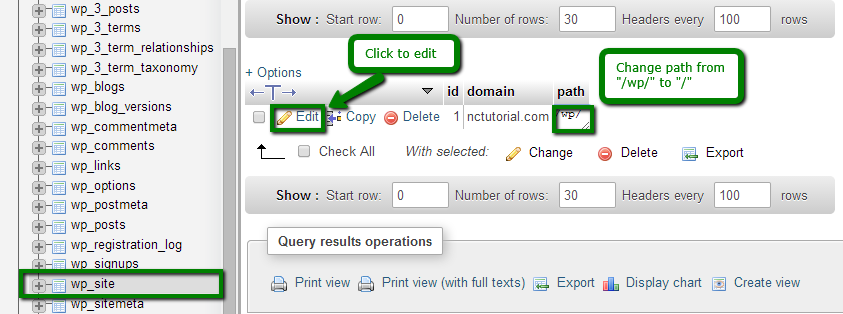
wp_site: change path from /subfolder/ to / :
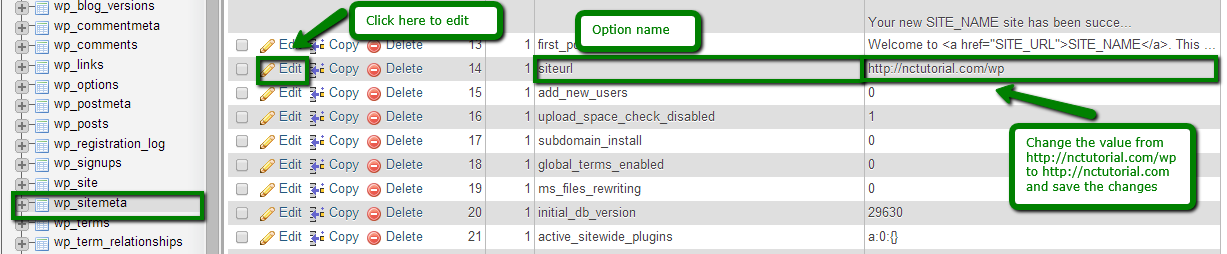
wp_sitemeta: change the ‘siteurl’ option from http://yourdomain.com/subfolder to http://yourdomain.com:
wp_blogs: change paths for each site and remove ‘subfolder’ from there:

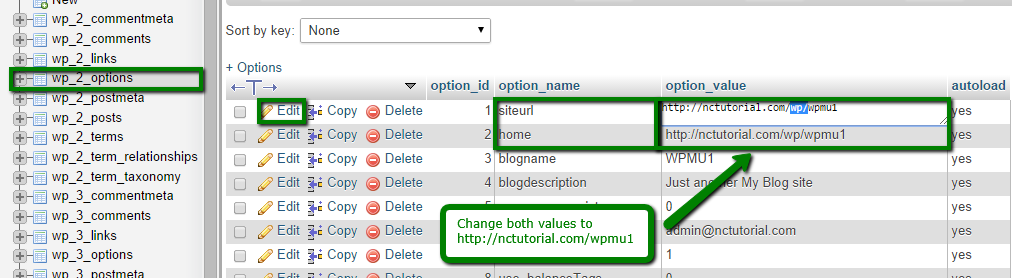
wp_#_options: each site created in the WordPress network has its own sets of tables that corresponds to blog_id in the wp_blogs table.
The # here corresponds to the blog_id. So you need to go to each wp_#_options table and change options ‘siteurl’ and ‘home’.
In our example we have to change two blogs:
The first one is installed in the subdirectory:
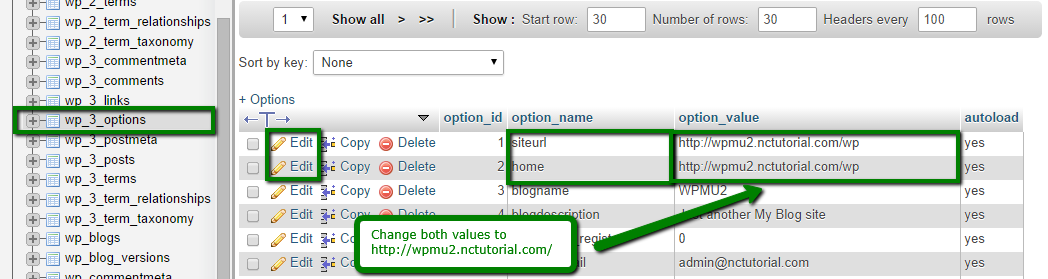
The second one is installed on a subdomain:
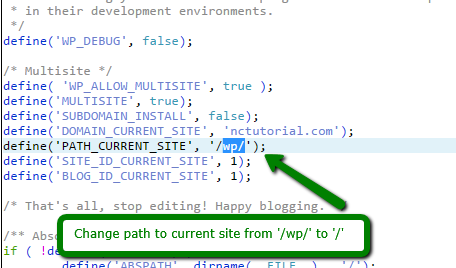
3. Editing wp-config.php
In order to do it, go to cPanel > File manager > open the folder for WPMU installation > choose wp-config.php > click Edit from the top menu.
You need to change ‘PATH_CURRENT_SITE’ from ‘/subfolder/’ to ‘/’ and save the changes:
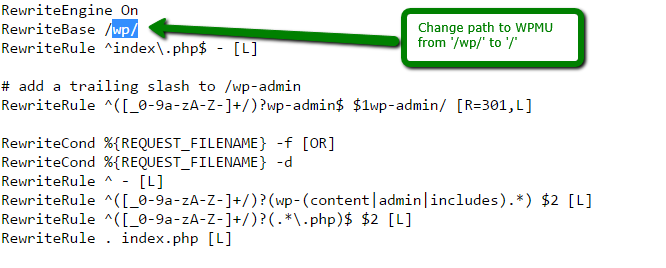
4. Editing .htaccess
You can find it in Panel > File manager > open the folder for WPMU installation > choose .htaccess > click Edit from the top menu.
Change the path from ‘/subfolder/’ to ‘/’ in the Rewrite Base row and save the changes.
NOTE: Depending on your website configuration, you may have more than one Rewrite Base directive in .htaccess that needs to be changed.
Now WPMU is transferred to the domain itself instead of resolving from the subdirectory.
As for the WPMU transfer from one domain to another one, you may use the same steps above, but in the database the domain itself should be changed instead of the directory. After this change the domain name in the wp-config.php file and your WPMU are ready.
Alternatively, we recommend another way of changing the domain for your WPMU. (You can also use it for the WPMU transfer from a subfolder).
The steps are as follows:
1. Back up the WPMU installation, files and database.
2. Move the files from the current domain directory to the directory of the new one.
3. Now you need to update old URL references to the new ones in the database. This can be done using either search and replace scripts or text editors. Below we provide the guidelines using the latter.
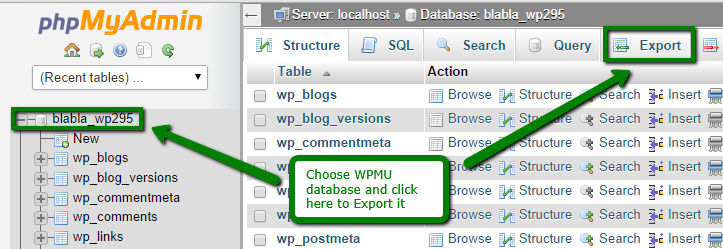
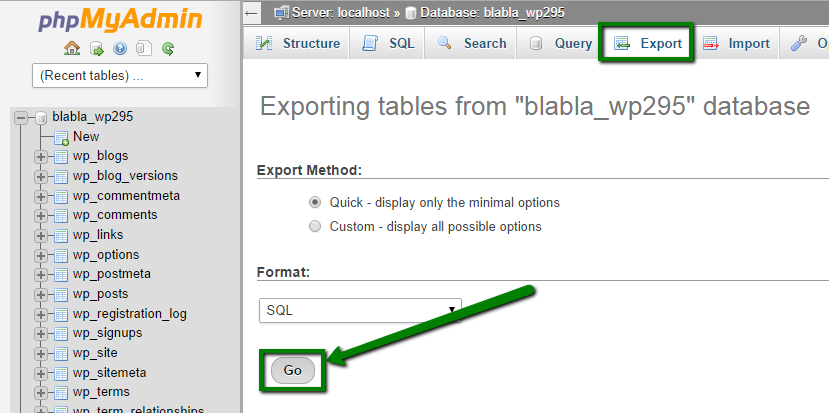
Go to cPanel > phpMyAdmin > choose the WPMU database on the left side > click Export in order to download the database in a .sql file to your computer:
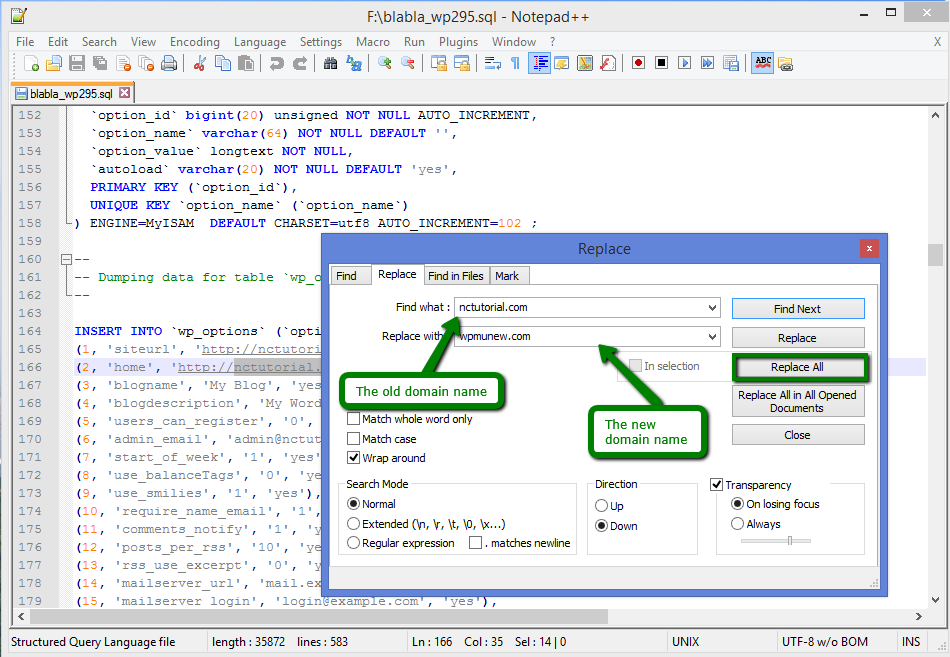
4. Open the exported .sql file in the plain text editor on your computer and replace the old domain name for WPMU installation with the new one. Once done, save the changes:
5. Go to cPanel > MySQL Databases menu and create a new database with a new user, assign this user to the database with all privileges as described in the article here.
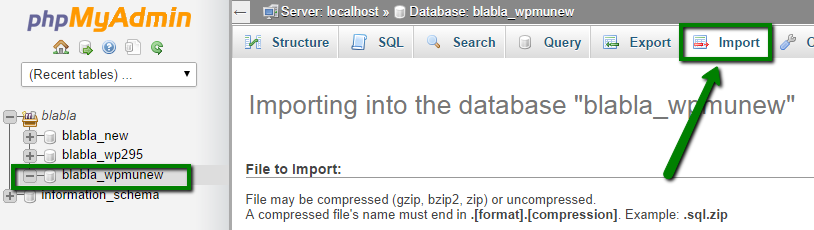
6. Go to cPanel > phpMyAdmin > choose the newly created database on the left side and click Import in order to import the updated .sql file:
NOTE: If the database is more than 50MB in size, it should be imported via SSH following the instructions here.
7. Open the wp-config.php file and edit the database details:
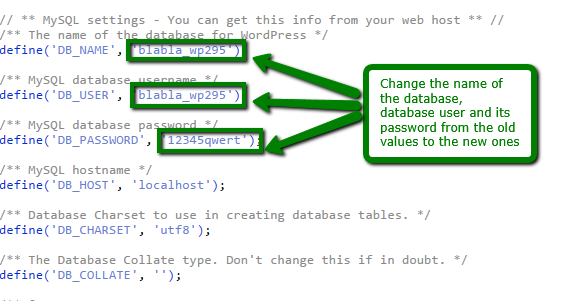
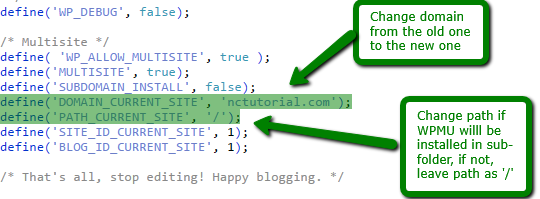
Then scroll down and change the old domain name to the new one and edit the path to the WPMU installation if necessary. If your WPMU is installed in yourdomain.com/sufolder/, you need to update the subfolder name correspondingly in wp-config.php and .htaccess files – path options. If WPMU is installed on yourdomain.com, leave the path – ‘/’ in both files:
Once all the changes are made, you may open the new domain and check your WordPress Multisite.
That’s it!
Need any help? Contact our HelpDesk