How to install a new theme for WordPress
A theme is a fundamental aspect of design if your site is built on WordPress. This is what the development of your website usually begins with. This article contains instructions on changing your WordPress theme:
for cPanel paper_lantern theme
for cPanel x3 theme
for cPanel paper_lantern theme:
theme installation via WordPress dashboard (automated)
theme installation via File Manager (manual)
theme change through website database
The easiest and the most widely-used method is to do that via your WordPress dashboard. You can log into it usually via http://yourdomain.com/wp-admin.
1. Navigate to Appearance menu on the left side > Themes:
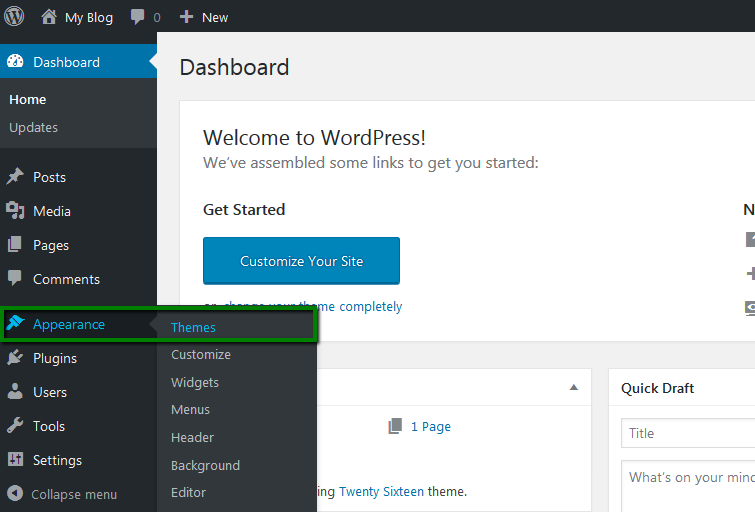
2. On the next page, you can manage your installed themes or install a new one. If you are going to install a theme, you hit Add New button:
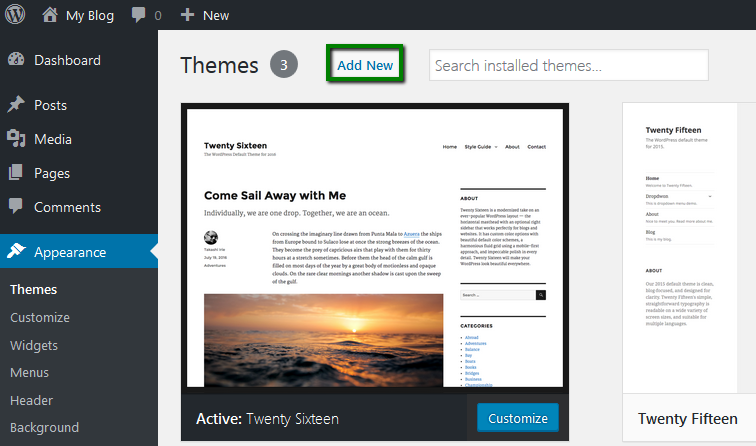
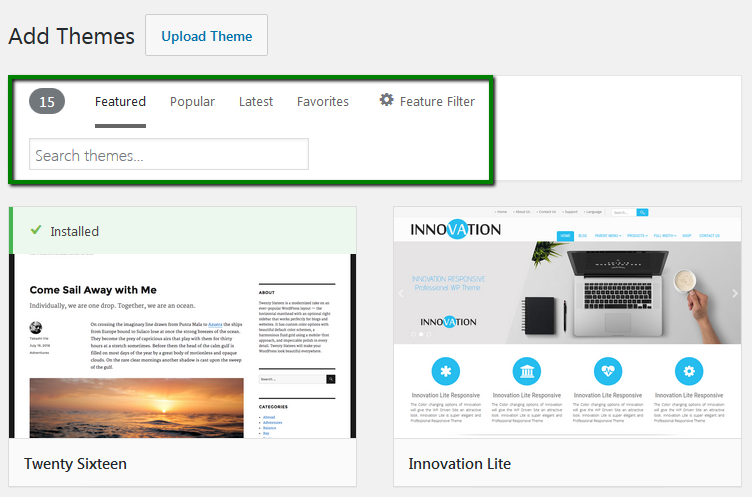
3. You will see the list of the themes available for installation. It is possible to do the following:
- Select Featured, Popular, Latest or Favorites ones to install
- Use the built-in Search if you need to find a certain them
- Set certain filters by clicking on Feature Filter
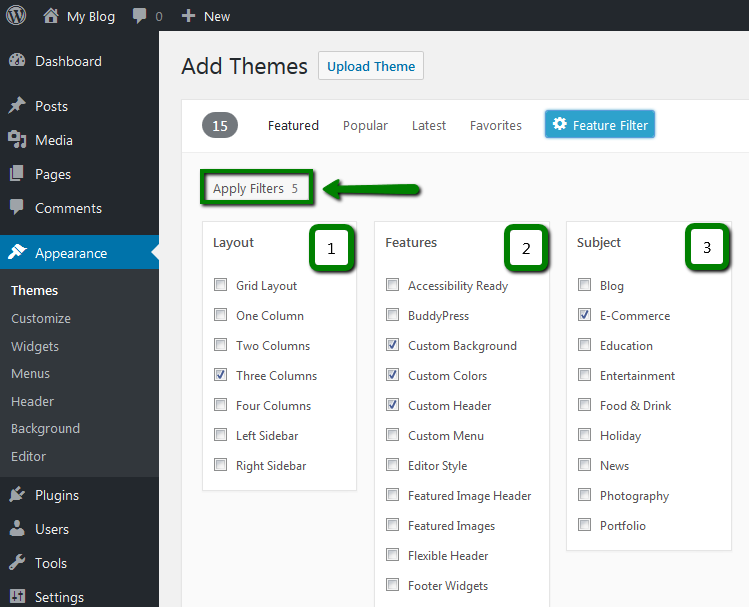
4. After Feature Filter is selected, you will be able to narrow down your theme search by checking the necessary parameters.
You can search by Layout (1), Features (2) and Subject (3). Once selected, click on Apply Filters:
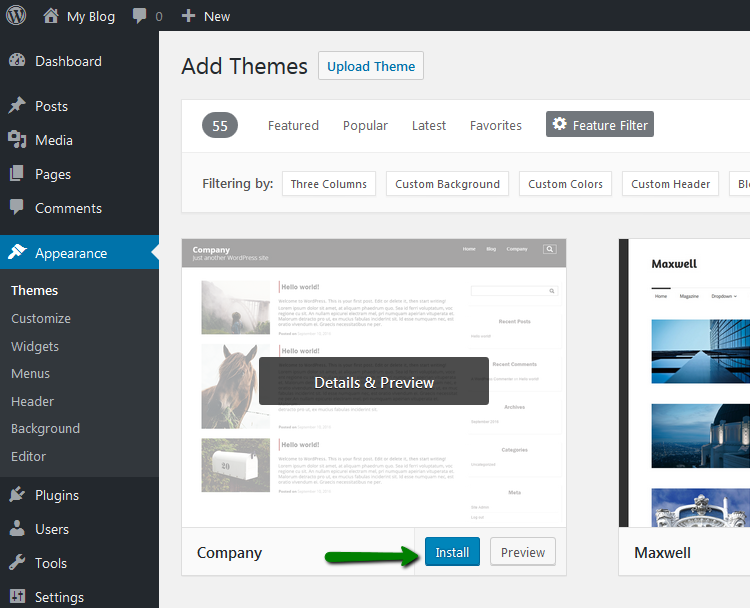
5. When the list of the themes you search for is displayed, you will be able to preview the one you like. To set it up, click on the Install button:
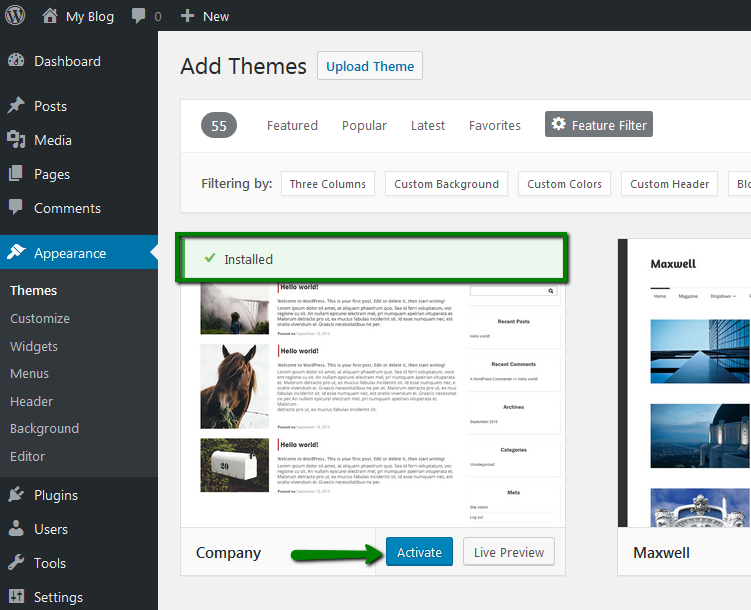
6. As soon as the setup is finished, you can activate the theme at once by clicking Activate:
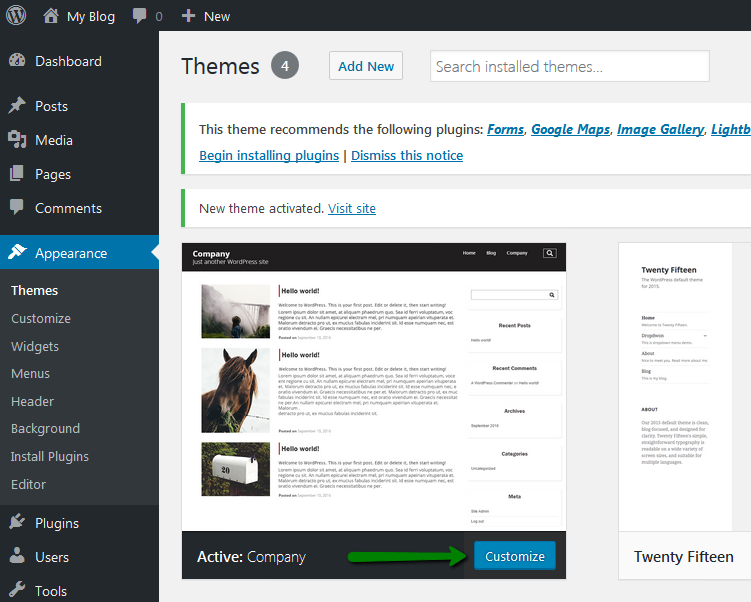
7. After that, you may start customizing it depending on your needs:
The second way to install a theme for your WordPress website is via cPanel File Manager. You should have a file of archived theme files on your PC saved beforehand.
1. In order to upload a theme file to your account, log into your cPanel.
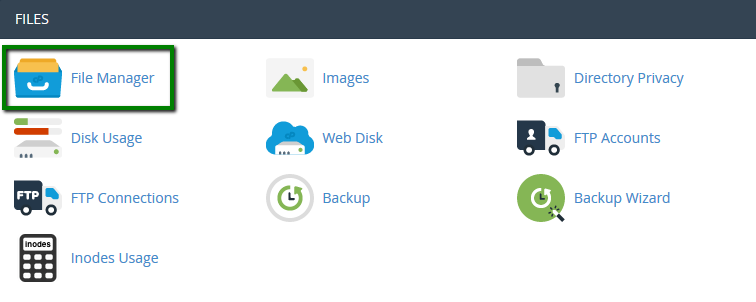
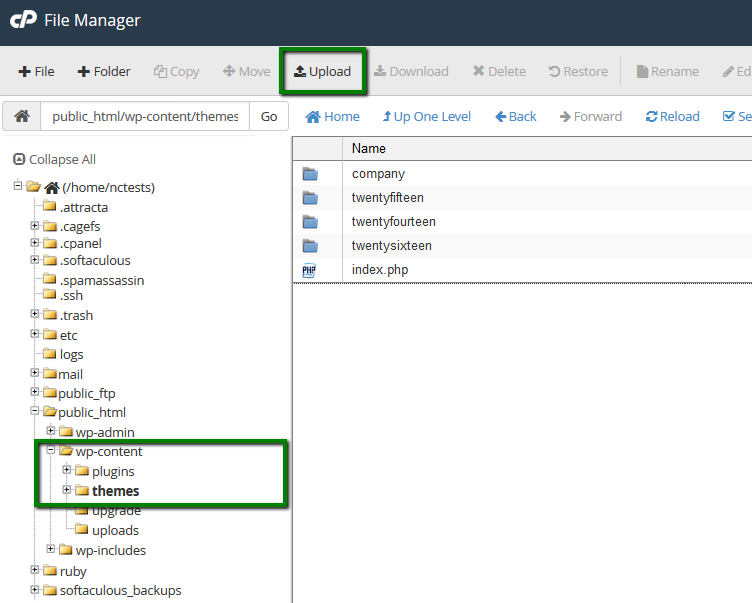
2. Navigate to Files section > File Manager menu:
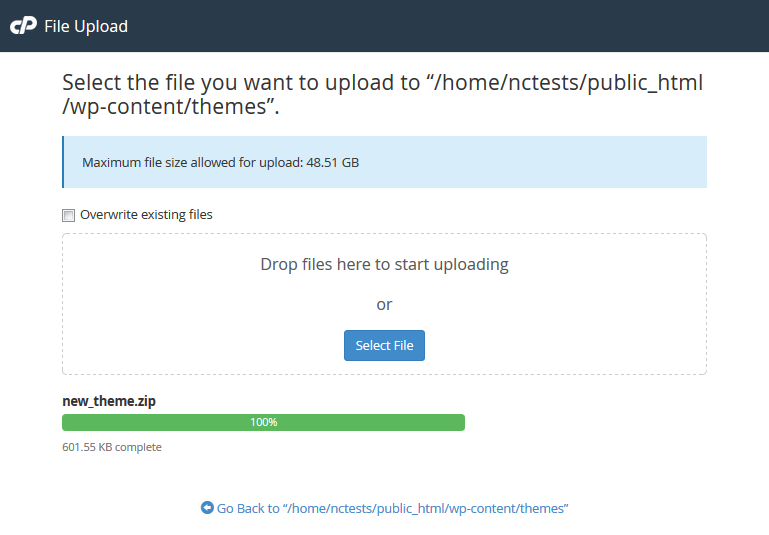
3. Move to the website directory root and locate /wp-content/themes/ folder. Click the Upload button, find your theme archive and upload it to the required directory:
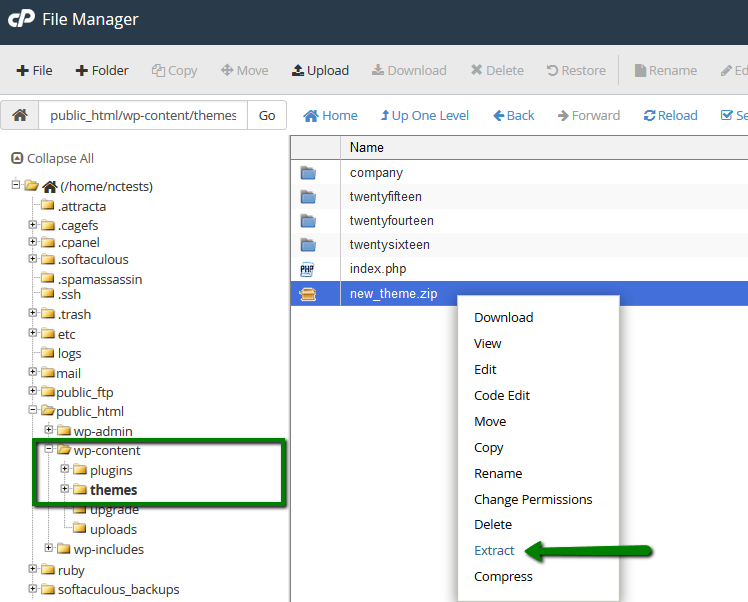
4. Extract the theme files and make sure the theme folder is located in the right directory:
5. Access your WordPress Admin Dashboard then and navigate to Appearance > Themes. Find a new theme you extracted and activate it.
Another way of switching the theme via database is usually used in emergency cases. For example, your theme is corrupted or hacked, and you do not have access to your WordPress Dashboard. Such cases can be resolved by switching to a default theme, and as you do not have access to the Dashboard, you need to do that directly in your database.
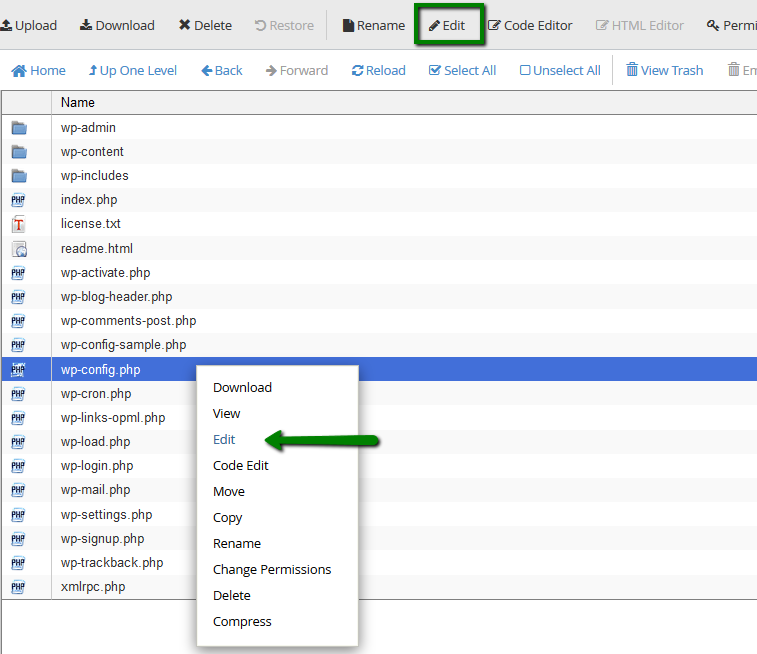
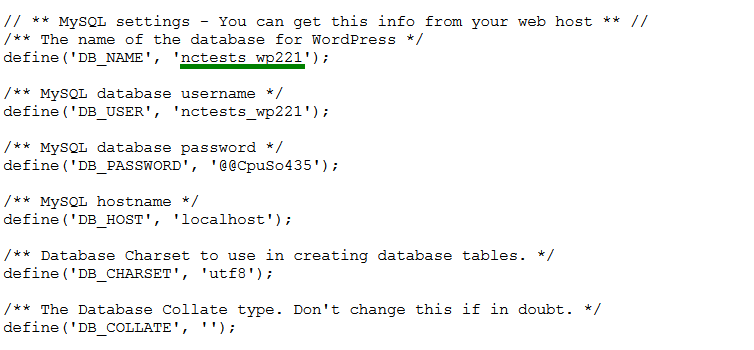
1. You can check what database is used for your WordPress website in wp-config.php file located in cPanel >Files section > File manager menu in the root folder for your WordPress installation:
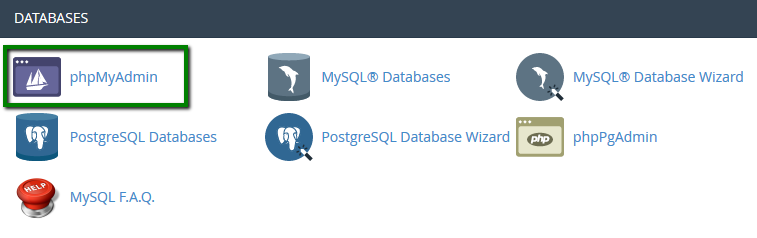
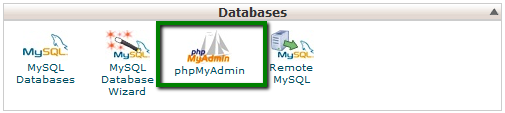
2. In order to access the database, you need navigate to Databases section in cPanel > phpMyAdmin menu:
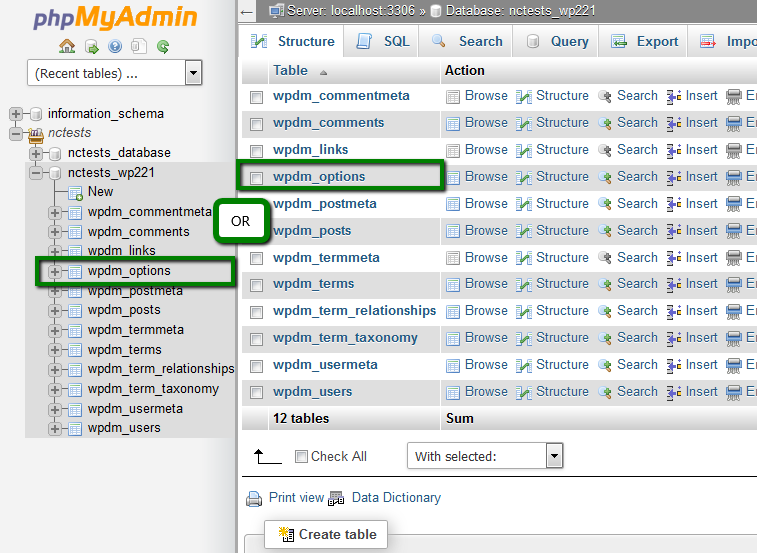
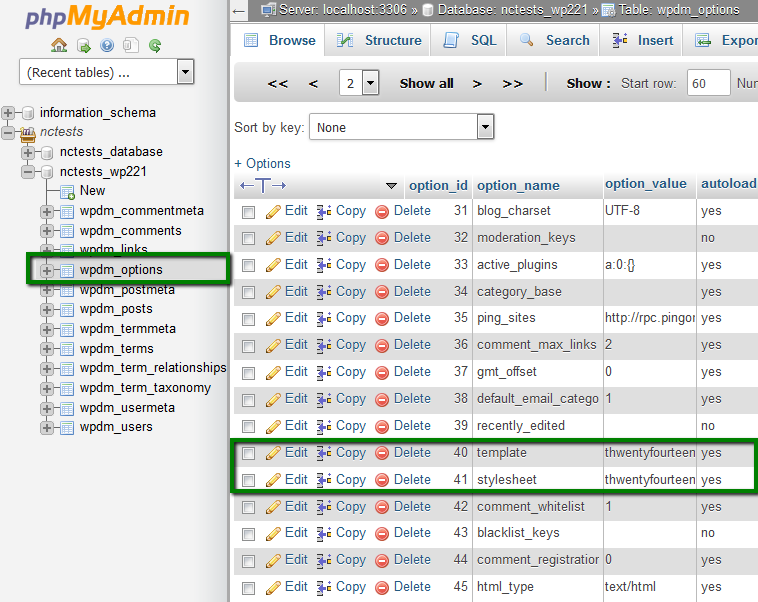
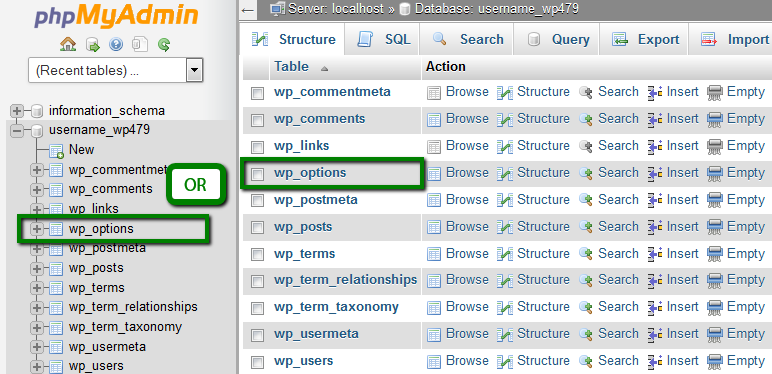
3. After that, you need to select a database which is assigned to this WordPress website in the left part of the window and select wp-options table:
4. The columns (template and stylesheet) related to the activated theme are usually located on the second page:
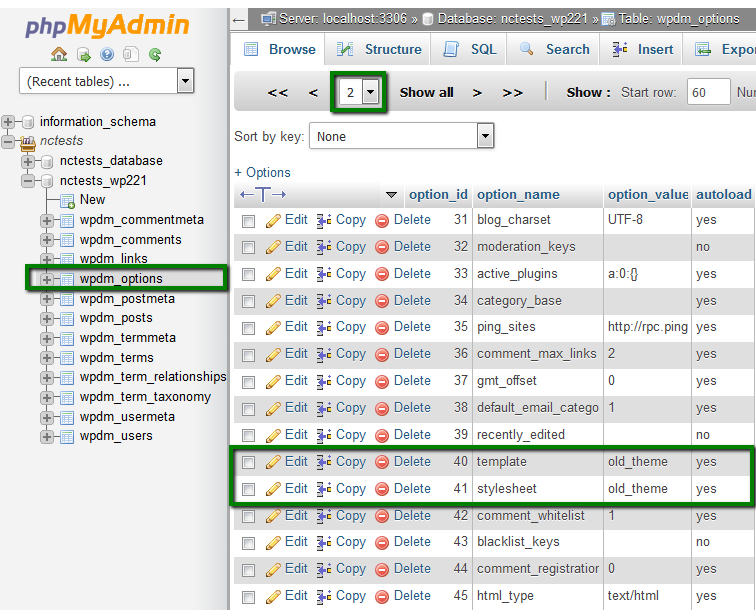
5. You need to change these values to the name of a default theme. For example, thwentyfourteen,thwentyfifteen or thwentysixteen:
This will switch your theme to the necessary one.
for cPanel x3 theme:
theme installation via WordPress dashboard (automated)
theme installation via File Manager (manual)
theme change through website database
The easiest and the most widely-used method is to do that via your WordPress dashboard. You can log into it usually via http://yourdomain.com/wp-admin.
1. Navigate to Appearance menu on the left side > Themes:
2. On the next page, you can manage your installed themes or install a new one. If you are going to install a theme, you hit Add New button:
3. You will see the list of the themes available for installation. It is possible to do the following:
- Select Featured, Popular, Latest or Favorites ones to install
- Use the built-in Search if you need to find a certain them
- Set certain filters by clicking on Feature Filter
4. After Feature Filter is selected, you will be able to narrow down your theme search by checking the necessary parameters.
You can search by Layout (1), Features (2) and Subject (3). Once selected, click on Apply Filters:
5. When the list of the themes you search for is displayed, you will be able to preview the one you like. To set it up, click on the Install button:
6. As soon as the setup is finished, you can activate the theme at once by clicking Activate:
7. After that, you may start customizing it depending on your needs:
The second way to install a theme for your WordPress website is via cPanel File Manager. You should have a file of archived theme files on your PC saved beforehand.
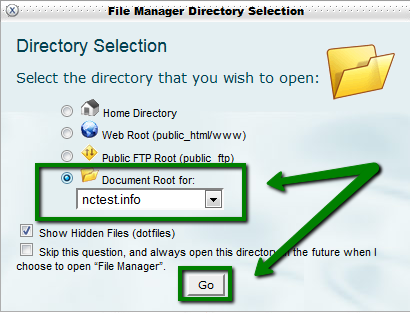
1. In order to upload a theme file to your account, you need to access your cPanel, navigate to the Filessection and click File Manager. Select the Document root for option, choose the required domain in a drop-down menu and click Go:
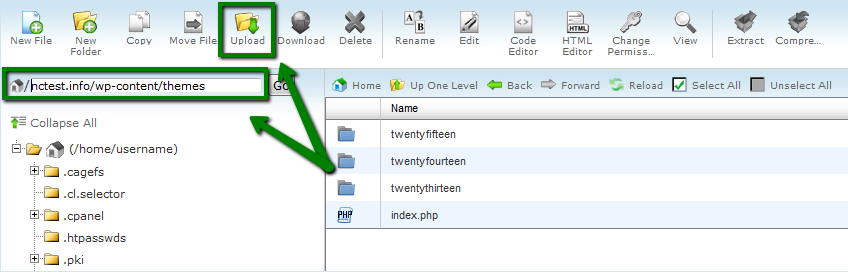
2. Once redirected to the website directory root, go to the /wp-content/themes/ folder. Click the Uploadbutton, find your theme archive and upload it to the required directory:
3. Extract the theme files and make sure the theme folder is located in the right directory:
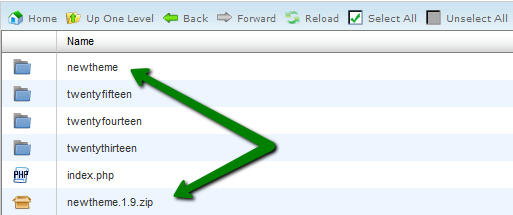
4. Access your WordPress Admin Dashboard then and navigate to Appearance >> Themes. Find a new theme you extracted and activate it.
Another way of switching the theme is usually used in emergency cases. For example, your theme is corrupted or hacked, and you do not have access to your WordPress Dashboard. Such cases can be resolved by switching to a default theme, and as you do not have access to the Dashboard, you need to do that directly in your database.
NOTE: You can check what database is used for your WordPress website in the wp-config.php file located in cPanel > section Files > File manager > navigate to the document root of your WordPress website.
1. In order to access the database, you need to log into your cPanel, navigate to the Databases menu and click phpMyAdmin:
2. After that, you need to select a database which is assigned to this WordPress website in the left part of the window and select the wp-options table:
3. The columns (template and stylesheet) related to the activated theme are usually located on the second page, they are shown in the screenshot below:

4. You need to change these values to the name of a default theme. For example, thwentyfourteen,thwentyfifteen or thwentysixteen:

This will switch your theme to the necessary one.
That’s it!