How to activate CloudFlare
ACTIVATING CLOUDFLARE
There are two setup options for Cloudflare:
- Partial (CNAME) setup
- Full DNS setup.
When you use Partial (CNAME) setup, Naija Domains manages your web site’s DNS settings. You can quickly and easily enable and disable CloudFlare for your domain and subdomains from within cPanel, as well as view basic site statistics.
When you use Full DNS setup, CloudFlare manages your web site’s DNS settings, only some settings may be managed from within cPanel. Login directly to the CloudFlare site to manage all settings for your domains.
Which activation method you use depends on how you want to manage your CloudFlare and DNS settings (that is, from within cPanel or by logging into a separate site). Of course, if your account does not include cPanel, then you must activate CloudFlare using their web site.
OPTION #1: PARTIAL (CNAME) SETUP
To activate CloudFlare with Partial(CNAME) setup, follow these steps:
- Log in to cPanel.
If you do not know how to log in to your cPanel account, please see this article.
- In the Software section of cPanel, click the Cloudflare icon:

- On the Cloudflare page, click :

- A new window appears:
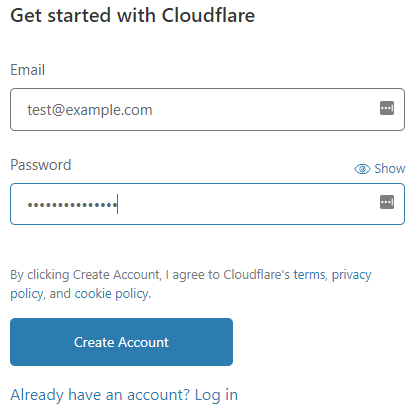
- Type an e-mail address and password.
- Review the Terms of Service, and then select the check box if you agree.
- Click to continue.
- On the next page, in the Add a Website text box, type the domain to be proxied by Cloudflare. Click to continue:
- A brief introductory video appears while DNS for the domain is analyzed. When the video and analysis is complete, click .
- DNS analysis results appear on the next page. The settings shown are not important since this method does not use them. Click .
- On the next page, choose a plan. Click Free Website, and then click :

- The next page displays nameservers to use for your domain. At this point you can close the Cloudflare window. There is no need to update nameservers when using the Partial (CNAME) setup.
- Return the the cPanel main page by clicking the logo at the top left of the page.
- Return to the Cloudflare page by ckicking on the Cloudflare icon.
- Click the Domains icon in the toolbar on the Cloudflare page. The domain added in step 5 above should be listed.

- Scroll to the bottom of the page and click the button.

- The page will refresh after a moment. Now the Partial (CNAME) setup can be chosen by clicking the button.

OPTION #2: FULL DNS SETUP.
To activate CloudFlare with Full DNS Setup follow these steps:
- Follow step one through six from Option #1.
- After clicking Continue in step 6 above, DNS analysis results appear on the next page. Review the DNS settings to make sure thay are correct. Make any necessary changes and then click Continue..
- On the next page, choose a plan. Click Free Website, and then click :
- The next page displays nameservers to use for your domain. Make a note of the nameservers.
- Use the control panel at the domain’s registrar to change the nameservers to those provided by Cloudflare.
- Cloudflare will be active once the nameserver changes have propagated – typically 24 hours or less.
When you use Full DNS setup only some settings can be managed from cPanel. Use the CloudFlare site instead to manage all CloudFlare settings for your account. For information about how to do this, please visit https://support.cloudflare.com.
MORE INFORMATION
For general information about CloudFlare, please visit https://www.cloudflare.com.