File permissions
Each file and folder located in your account has certain permissions assigned. They define who is authorized to write, read or execute this file.
Once it is created in your cPanel, default permissions are assigned. In most cases, there is no need to change them, but certain installations or updates may require a file or folder permissions change.
There are three types of access:
- read: the file can be only read
- write: the file can be edited
- execute: the file can be executed as a program
There are three types of user groups, these access types can be applied to:
- owner: the owner of the file
- group: other files which are in the same folder or group
- world: anyone else
The access level is defined in numbers:
- 0 – no access to the file
- 1 – execute only
- 2 – write only
- 3 – write and execute
- 4 – read only
- 5 – read and execute
- 6 – read and write
- 7 – read, write and execute (full permissions)
The following permissions need to be set in order for your files to be displayed properly in the browser:
- For all HTML and image files, the permissions have to be set to 644 (or 0644). They will be readable by all the user groups, but writable by the user only. These permissions are set automatically when the file is created.
- Folders the permissions have to be set to 755 (or 0755). The folders will be readable and executed by others, but writable by the user only. These permissions are set automatically when the folder is created.
- For all CGI files, the permissions have to be set to 755 (or 0755). The files will be readable and executed by others, but writable by the user only. These permissions are NOT set automatically once the file is created, you should adjust them manually.
It is possible to view file/folder permissions either via File Manager in cPanel or SSH command line.
- for cPanel paper_lantern theme
- for cPanel x3 theme
for cPanel paper_lantern theme:
1. Log into your cPanel, navigate to the Files section and click the File Manager icon:
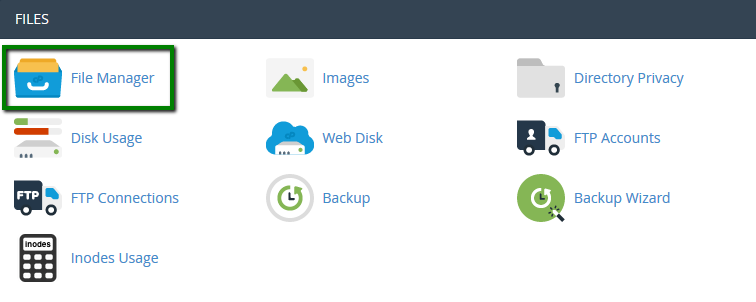
2. Move the document root for your domain name.
If you need to change the permissions for the main domain name, navigate to public_html folder. If you need to change the permissions for the addon domain name files, move to public_html/addondomain.com folder.
We have public_html folder in our case:
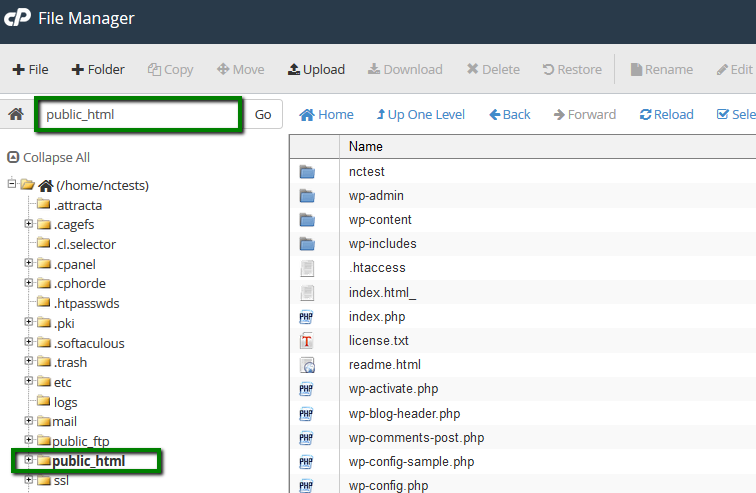
3. You will be able to see currently assigned permissions in the right-hand column called Permissions:
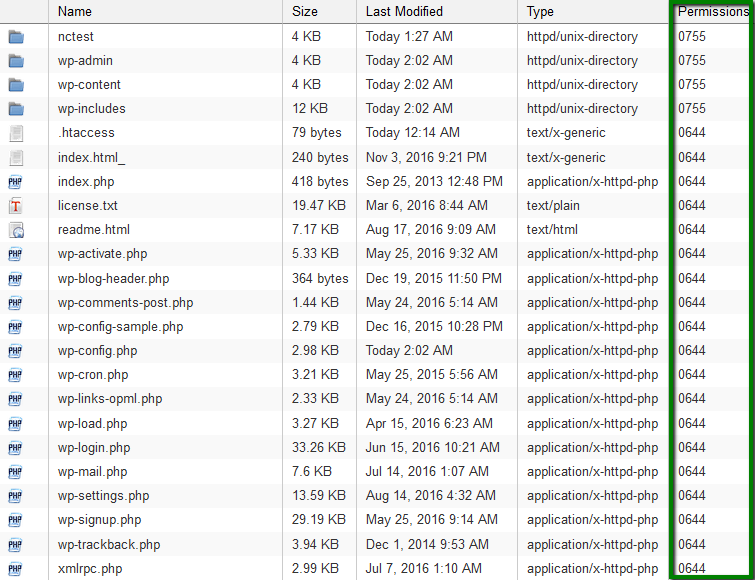
4. To edit the current permissions for a certain file/folder, right-click on it and choose Change Permissions. A related window will pop up:
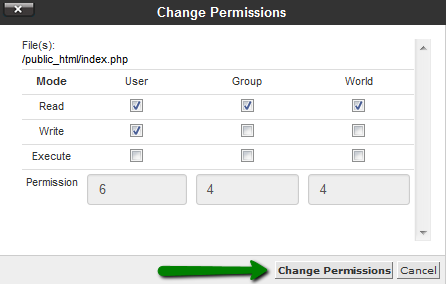
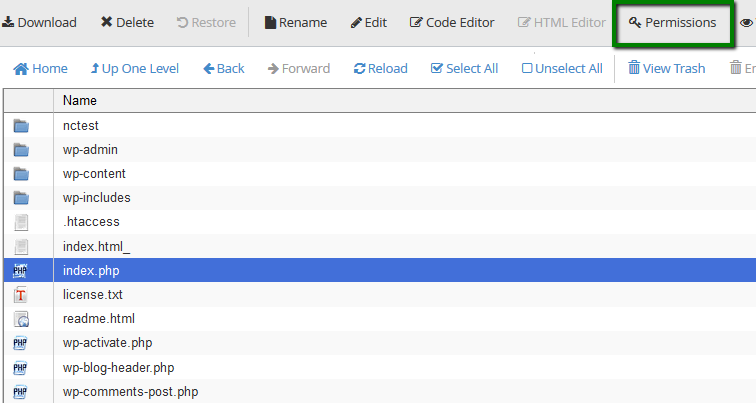
5. Set required permissions for each user group and save the changes. It is also possible to use the same button in the File Manager upper-bar menu, Permissions option:
for cPanel x3 theme:
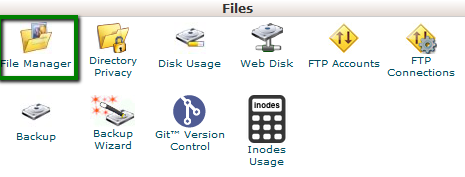
1. Log into your cPanel, navigate to the Files section and click the File Manager icon:
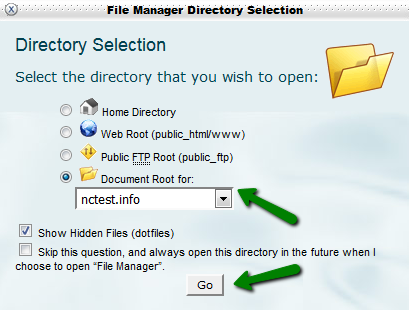
2. Check the Document Root for: option and choose the domain you wish to access the directory for. Click on Go then:
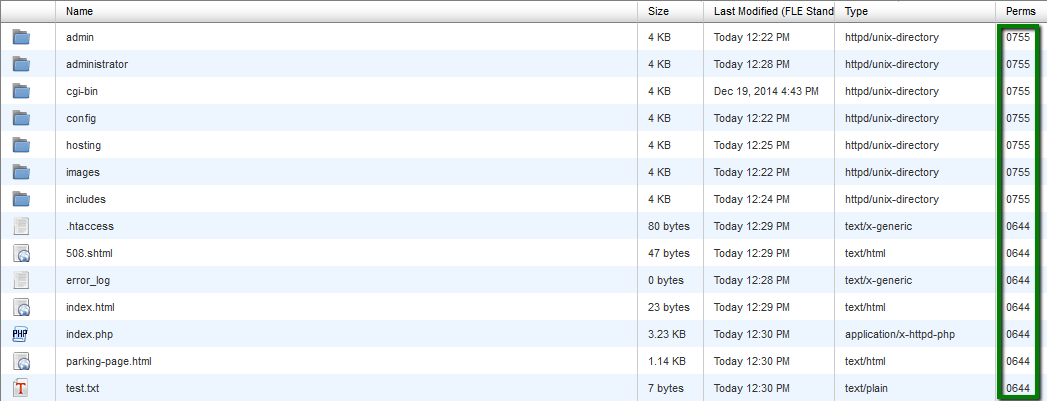
3. You will be able to see currently assigned permissions in the right-hand column called Perms:
4. To edit the current permissions for a certain file/folder, right-click on it and choose Change Permissions. A related window will pop up:
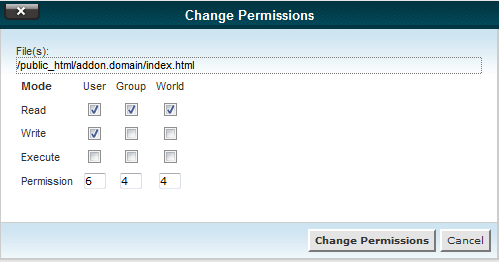
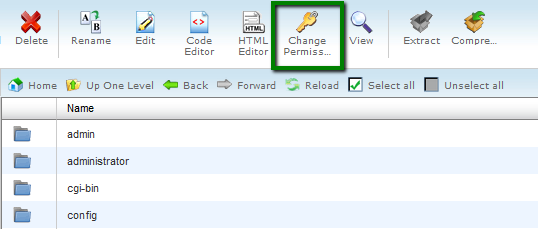
5. Set required permissions for each user group and save the changes. It is also possible to use the same button in the File Manager upper-bar menu:
1. Once logged into your account via SSH, run the following command to check the permissions assigned to files and folders in the current directory: ls -l
NOTE: You can also use the ls -alh command to get the list of ALL the files within the directory (even hidden ones) in a human readable format and with additional details.
2. To check the permissions assigned to files and folders in a certain directory (not the one you are currently in), just add the full path after the command:
ls -l /home/$USER$/destination_directory
where $USER$ is your cPanel username and destination_directory is the path to the directory you check permissions in. You will get the following output:

3. In the Linux shell environment permissions are expressed in the following way:
drwxr-xr-x
The very first character stands for the file type: d – directory. Next three letters represent the owner permissions (user ones):
r = read
w = write
x = execute
– = no permission
Normally, the Owner has all three permissions represented by rwx.
The next three characters define the Group permissions, and the last letters represent World ones. In place of ‘w’ there is a hyphen, which means that writable permissions are not allowed for Group and World.
NOTE: Checking and understanding file/folder permissions via the shell environment is mostly for advanced users. If you have no other intention than checking/editing file permissions, it is recommended to use the GUI cPanel interface.
That’s it!